DIY Bug Hotel / Insect House with Bostik

As you all know, I love any excuse to make things, so I was delighted to be invited by HIBS100 to become a DIY Bostik blogger for six months. My mission, which I’ve chosen to accept, is to create a DIY tutorial on a set theme each month, and share it with you. The first theme, to my delight, was Garden Decor!

DIY Bug Hotel_Shelley Makes-8612

Now, Bostik make some great products for crafters – in fact, you’ll have seen some of their products in my DIYs before. The glue dots and foam pads are excellent for card-making, so I was excited to try out some of the other products in the range. To get me started, Bostik sent me a box of glue-based goodies to experiment with, including leather adhesive, all-purpose glue, white glu, blu stick (a glue stick that starts blue and dries white), fast tak spray glue, glu dots, micro dots, foam pads and glitter pens!

DIY Bug Hotel_Shelley Makes-8568

This summer I’ve been loving spending more time outdoors, watching the comings and goings of nature’s pollinators, so I thought I’d have a go at making my own insect house for our allotment. We have a bug hotel / insect house in our back garden, and there has been no room in the inn (as it were), since the first day it went up! As it’s so popular with flying folk, I used this design for inspiration.

To make your own bug hotel, you will need the following materials:

  • Bostik white glu (PVA)
  • Plank of wood – mine was planed smooth timber (18mm x 94mm x 1800mm) from B&Q
  • Sheet of plywood (for the roof) – have a peek in your local wood shop’s ‘scrap’ bin (alternatively, you could use your smooth timber and have a thicker roof…)
  • Outdoor paint – a Cuprinol tester pot (£2) will be more than enough
  • Blue painter’s tape or masking tape (to hold your house together while the glue dries)
  • Sandpaper (if you have it – optional)
  • Bamboo canes (optional)
  • Wooden ladybird to decorate (optional)
  • Bostik glu dot to afix ladybird (optional)

Continue reading

DIY Easter Egg Inspiration

I love the arrival of Easter as for me it signifies the start of spring – what can be more cheery than sunny yellow daffodils and baby chicks? Over the years I’ve shared some Easter craft inspiration (such as decorated eggs here & amazing Easter cakes here), and even some DIY Easter tutorials (check out my DIY origami Easter bunniesDIY origami Easter bunny baskets, and DIY Easter bunny cards), so this year I wanted to share some fresh DIY Easter egg inspiration – featuring paint, concrete, and dyes!

DIY Easter Egg Inspiration_Shelley Makes

For full DIY tutorials, check out these blogs:

1. Paper & Stitch, Pink Crescent Moon Easter Eggs | 2. Idle Hands Awake, DIY Modern Brushstroke Easter Eggs | 3. Flax & Twine, DIY Wood Grain Folk Art Flower Easter Eggs | 4. Mottes Blog, DIY Crowned Bunny Easter Eggs | 5. Look What I Made, DIY Concrete & Copper Easter Bunnies | 6. We Are Scout, Easter Bunny Mini Eggshell Vase | 7. Sugar & Charm, Mosaic Easter Eggs | 8. Paper & Stitch, DIY Black Galaxy Natural Easter Eggs | 9. Say Yes, Natural Tea Dyed Easter Eggs Continue reading

#CraftBlogClub Secret Santa 2017

Happy New Year everyone! Better late than never, I wanted to finally share my #CraftBlogClub Secret Santa with you! If you’ve not heard me bang on about this before, the CBC Secret Santa is a brilliant initiative by Fiona and Katie who run the weekly #CraftBlogClub Twitter chat every Tuesday at 8pm.

Maker:S,Date:2017-9-12,Ver:6,Lens:Kan03,Act:Lar02,E-ver

Each year, anyone with a passion for craft can take part to make and receive a handmade present from the #CraftBlogClub community. Though I haven’t managed to join the chats much lately, my experience of this community is that they’re one of the warmest, most encouraging bunch of people you could ever wish to e-meet. It’s always a pleasure, so do join in if you can!

Somehow this was my third year taking part (where does the time go?!). In Year 1 you might remember that I made a DIY felt cupcake needle-book and cupcake pin-cushion ring for ZoFlo, and last year I made DIY homemade goats milk and honey soaps for Laura, which turned out quite well.

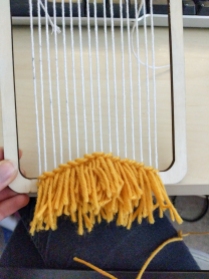
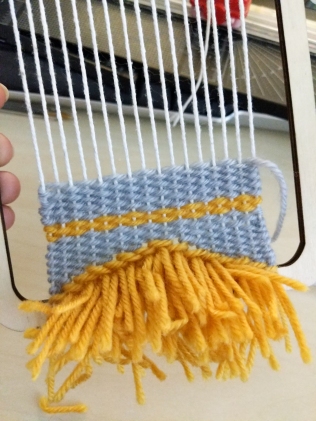
This year, my Secret ‘Santee’ was Naomi Jade. After a little stalk of her blog and social channels, I saw that she was a lover of all things cosy and also quite girly, so I decided to make her a DIY miniature wall hanging. I used a weaving kit that I got for free with a Mollie Makes magazine earlier this year.

Continue reading

DIY Valentine’s Craft Inspiration

With less than a week until Valentine’s Day, here’s my round-up of this year’s Valentine’s craft inspiration, including everything from DIY cards, to DIY gift wrap, boxes and planters. Hope you love it! ❤

For previous year’s inspiration, check out here and here, or find one of my DIY tutorials here.

Valentines DIY Inspiration 2017.png

For full DIY tutorials, check out these blogs:

1. Paper & Stitch, DIY Candy Boxes | 2. Paper & Stitch, DIY Watercolour Stationery | 3. Sugar & Cloth, DIY XO Gift Wrap | 4. Oh Happy Day, ‘I’d Pick You’ Flower Valentine | 5. Oh Happy Day, Heart Balloon Valentine | 6. A Bubbly Life, DIY Valentine Flower Bouquet | 7. Paper & Stitch, ‘Life Would Succ Without You’ Planter | 8. The House That Lars Built, Hand Holding Hearts Pop Up Valentine | 9. Studio DIY, 3D Heart Gift Wrap

Continue reading

Hobbycraft Spring & Easter Craft Preview

Last week, I went along to Drink, Shop & Do near King’s Cross in London to preview Hobbycraft’s new Spring and Easter craft collections. Ever since I started blogging, it’s been an aim of mine to attend a Hobbycraft event, as I do buy a lot of my supplies from there, so I was thrilled to get an invitation.

Hobbycraft Spring Easter Blogger Event_Shelley Makes-3419.jpg

I tagged along after work and was greeted at the door by the Hobbycraft team. They’d split the Drink, Shop & Do floor into various stations so that you could try your hand at different crafts, and learn more about their upcoming range expansions, from sewing supplies, knit craft, Easter craft, and baking.


Sewing Machines

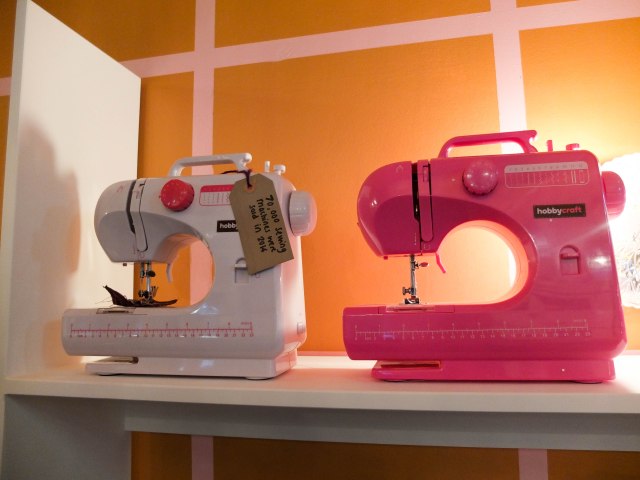
My first stop was the sewing machine station where a helpful seamstress named Amy sat me down at a sewing machine for the first time, and showed me how to do some basic stitches. Some of you might recall that I was bought a sewing machine for Christmas a few years back, and am ashamedly yet to use it, as I wasn’t really sure where to begin, so I was really excited about this opportunity.

hobbycraft-spring-easter-blogger-event_shelley-makes-3498

Continue reading

Homemade DIY Goat’s Milk & Honey Soaps

This year I was delighted to take part once again in the #CraftBlogClub Secret Santa. In case you haven’t heard of it, #CraftBlogClub is a weekly Twitter chat which takes place between 7 – 8pm every Tuesday, hosted by the lovely Katie (@katiegetscrafty) and Fiona (@fizzijayne), with occasional guest hosts.

craft-blog-club-secret-santa_shelley-makes-5365

As well as chatting all things craft, throughout the year, Katie and Fiona love to set us seasonal crafty challenges from spring-cleaning (stash swapping) to upcycling, but my favourite has to be the annual Secret Santa where everyone is paired off to create homemade presents for each other.

craft-blog-club-secret-santa_shelley-makes-5458

You might remember that last year I made a DIY felt cupcake needle-book and cupcake pin-cushion ring for ZoFlo, and was lucky to receive an awesome crochet stash from Kate at Albert & Me.

This year I was paired with @knitknatlaura and decided to try my hand at homemade soaps for the first time. A while ago, I found this pin on Pinterest, and decided to give this ten minute DIY a go. The tutorial is by Heidi at Happiness is Homemade – it’s super easy, and the results do look really great.

Continue reading

Halloween Inspiration: DIY No Carve Pumpkins

Autumn is one of my favourite seasons; I love the red-tinged light that washes over everything, and it gets me thinking about two of my favourite festive events – Halloween, and Christmas! Usually I like to carve a pumpkin for Halloween, but if you hate the goo and the mess, or you just fancy doing something a little bit different, here’s my round-up of the best DIY no-carve (painted) pumpkins.

diy-no-carve-halloween-pumpkins-on-shelley-makes

For full DIY tutorials, check out these blogs:

1. DIY Pun-Kins, Studio DIY | 2. DIY Donut Pumpkins, Studio DIY | 3. DIY Emoji Pumpkins, Brit + Co | 4. Hand Painted Floral Pumpkin, Craftberry Bush | 5. DIY Tiny Message Pumpkins, Lovely Indeed | 6. DIY Hand-Painted Pumpkins, Simple as That | 7. DIY Paint Pen Pattern No Carve Pumpkins, Lovely Indeed | 8. DIY Mud Cloth Pumpkins, Homey Oh My | 9. Decoupage Paper Pumpkin, Brit + Co | 10. Balloon Dipped Pumpkin DIY, Paper & Stitch | 11. DIY Pumpkin Ice Cream Cone, Sugar and Charm

Continue reading

DIY Wooden Planter for your Doorstep

If you follow me on Instagram you might have already seen a few snaps of my latest DIY – a wooden planter for the dahlia on my front doorstep! My neighbour actually gave me the idea for the planter – she has an almost identical one in a dark lavender colour on her doorstep, and I got jealous.

DIY Wooden Planter by Shelley Makes (46)

Looking for something similar that would make my plastic-potted dahlia feel a little more welcome (and suave), I went on the hunt. On my first stop I found a ready-made wooden planter in Homebase. It looked great, but with a £24.99 price tag, I wasn’t quite prepared to part with the cash.

With a few hours left in the afternoon, I put the question to my boyfriend – “Can we make this?” In typical Jack style, he replied, “Yea”, and so we went around Homebase picking up the bits and pieces we needed to make it ourselves instead. We found cladding for £5.99, and some spruce for £6.

To make your own DIY wooden planter, you will need:

  • 2x lengths whitewood spruce (33mm x 33mm x 1.8m)
  • A pack of tongue-and-groove cladding
  • Saw (for cutting the wood to length)
  • Table saw / router (for creating the grooves)
  • Screws and a screwdriver
  • Some clamps
  • Paintbrush
  • Outdoor paint (We used Cuprinol Garden Shades in Malted Barley)

DIY Wooden Planter by Shelley Makes (47)

Continue reading

Inspiration: DIY Cupcake Topper Ideas

As it’s my birthday tomorrow (and I’ve got cake on the brain), I thought I would celebrate on the blog by sharing some of my favourite DIY cupcake toppers! From pin-wheels to pom-poms to clowns, these four toppers are bound to make your recipient smile, and you get to eat yummy cupcakes too!

Shelley Makes DIY Cupcake Topper Ideas

For full DIY tutorials, check out these blogs:

1. Better Homes & Gardens, Upcycled Book-Page Pinwheel Cupcake Topper | 2. 6 Bittersweets, DIP Pom Pom Cupcake Topper | 3. Studio DIY, DIY Balloon Cupcake Toppers | 4. Oh Happy Day, DIY Clown Cupcake Topper

Continue reading

DIY Papercut Christening Card

Last Sunday, Jack and I went to the christening of a baby boy named Carl. We made a paper-cut card for Carl’s big sister Lauren when she was christened a few years ago, so we thought we’d stick to the same style for her little brother, but this time using my Silhouette cutting machine, instead of a scalpel!

DIY Paper-Cut Christening Card (10) - Copy

Jack designed the paper-cut image using InkScape (free downloadable vector graphics software), which allows you to import images and convert them to line art, as well as draw various shapes. Jack imported three free line-art images from Google – a heart, a church, and a balloon. After importing and embedding the images, he traced the bitmaps and converted the images into two colours (black and white), so that he could see which sections would be cut out, and which would stay connected.

Once the vector had been generated, Jack modified the image using the node tool, which allowed him to remove unwanted features (such as complicated details on the windows), as well as change certain design elements (such as the door archway). He also created a cute picket fence and bunting.

DIY Christening Card InkScape

Continue reading