DIY Wordsearch Card

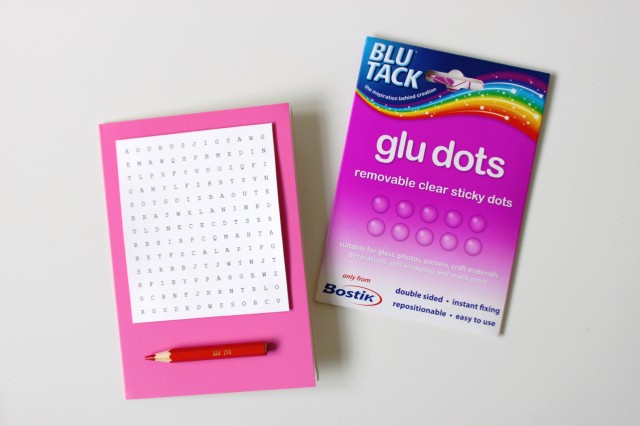
In May of last year I made my Grandma a DIY wordsearch card to combine a few of her favourite things – puzzles, and gardening. Well, a while ago, for some reason, I decided that this DIY wasn’t good enough for the blog, and I deleted it, and now – over a year later – I’ve changed my mind.

DIY wordsearch card on Shelley Makes.JPG

This is one of the simplest DIY cards you could possibly hope for. There are tonnes of free wordsearch generators available online that allow you to personalise your puzzles. I used one called www.puzzle-maker.com, where you can choose between making a custom wordsearch or a custom crossword.

diy-wordsearch-card-shelley-makes-ii

Continue reading

Easy DIY Origami Easter Bunnies

This time last year I found a tutorial to make some really easy (yet excessively cute) DIY origami Easter bunnies. They were filled with chocolate mini eggs and given to friends, family and neighbours.

DIY Origami Easter Bunny - Shelley Makes (19)

You can find the DIY tutorial over at Oh So Very Pretty. The initial design is by someone called Jacky Chan, and Leyla Torres has done a helpful YouTube video if you’re a visual learner like me!

Continue reading

The Handmade Fair 2015 – tickets on sale!

After half a year of anticipation, I was over the moon to hear that tickets were once again on sale for the second of Kirstie Allsopp’s Handmade Fairs at Hampton Court Palace.

The Handmade Fair 2015

My sister and I attended the inaugural event last September, and have been keenly awaiting tickets for the 2015 event ever since – which promises to be just as good, if not better!

As soon as I received my discount code from the Hobbycraft Club, I was on the phone to my sister asking her to consult the schedule, for at the Handmade Fair you can book yourself onto your choice of workshops. Last year, we attended the Mollie Makes mash-up, attempted ‘world pom-ination’ with Rosy Nicholas, and make chandelier ear-rings with The London School of Jewellery.

Picnic benches

This year the programme did not disappoint, with plenty of variety for keen craft-bods, and craft newbs alike. In the Super Theatre, you can observe masterclasses in everything from bread baking to upcycling. In the Grand Makes tent, you can try your hand at tibetan poetry bunting making, and block printing, and in the Skills Workshops you can learn new crafts spanning Papercraft, Textiles, Upcycling, and Seasonal Workshops. New to the skills line-up this year is the Wedding workshops, which includes everything from stationery marbling to creating DIY flower crowns.

Making floral hair pieces

Whilst it’s lovely to sit around in the sunshine at Hampton Court and grab a coffee, last year we found that ‘busy is better’, and as such, this year’s schedule is more jam-packed than ever. Here’s our proposed line-up (providing we can book additional places at the Skills workshops on the day):

10.00 – 10.25: GRAND MAKES: Wirework with Lucy Elisabeth
11.00 – 12.00: SUPER THEATRE: Chiara Perano and Calligraphy Sign Writing
12.30 – 13.30: SKILL – Upcycling: Upholster a drop-in seat with the Ministry of Upholstery
15.15 – 16.15: SKILL – Wedding: Flower Crowns with Kitten Grayson
16.45 – 17.30: SKILL – Papercraft: Lino Printed Stationery with Zeena Shah

Believe it or not, this still leaves time to book additional workshops (don’t worry, Origami, I’ve noted that we can squeeze you in after lunch). But on top of all this, there’s also the excellent shopping villages and stalls packed with craft suppliers (by golly, did I spend a lot last year!).

In the shopping tents

In conclusion, I wanted to spread the word that The Handmade Fair is back, and urge you to book your tickets if you haven’t already done so, as it’s set to be another genuinely brilliant event.

Pop the date in your diary now: Friday 18th – Sunday 20th September. Will you be going?
Sewing Geometric Christmas Cards

Christmas is one of my favourite times of year – I love the cosiness, and the handmade gestures. This year, I decided to make a few Christmas cards for my nearest and dearest.

Four cards

Inspired by the branding of Mote & Produksjon (Fashion & Production), I decided to get with the trend and sew different geometric patterns onto the front of my A5 cards.

Geometric Sewing Card

Instructions:

Start by creating your A5 folded cards (cutting down from A4 if necessary). I used dark colours (a navy, and mocha) that would contrast with my cream cotton thread.

I decided to make my pattern 5cm x 5cm, so I cut out a template square to size that I could position where I wanted the pattern to be, and marked the corners with a pencil.

Using the marks as a guide, I then made further pencil marks every 1.25cm until I had a square grid consisting of 25 dots. Using a needle, I then pierced holes over each of the dots.

Geometric shape

I used a cream cotton thread for my patterns, and selected the designs by Mote & Produksjon that had the most festive feel – aka, the ones that most resembled stars and snowflakes!

Once each pattern was complete, I tied the ends of the thread together on the inside of the card and cut the loose ends. I then added a smaller black paper insert to each card.

Sewing Geometric Cards

I tried two different techniques for this – on some I used double-sided tape to secure the insert, whilst on a couple of the designs, I stitched the spine to bind the insert to the card.

Personally, I love a good theme – you could also make matching gift tags using the same emblems. What do you think? Are you handy with a needle and thread?

What Christmas cards have you been making?

DIY Mouse-Hole Cheese Card

Yesterday was my Grandma’s 78th birthday, and so we gathered for a family meal. For my partner’s grandparent’s, handmade gifts have always meant more than expensive presents.

Back in March, at the The Edible Garden Show, I spied a tiny wooden mouse by Bradgate Woodcraft that I thought she’d love, and I’ve been looking after the little fellow ever since.

Cheese cardAs time was tight (plan ahead, moi?), we decided to make a simple ‘cheese’ birthday card, complete with mouse-hole, so that the little mouse could sit underneath the card.

To make, all you need is some card, a circle cutter, and ideally a mouse. I didn’t plan my circles, I just cut them willy-nilly, and this is the result. It took around 10 minutes, so easy peasy!

Mouse

The eagle-eyed amongst you may notice that not all of my circles are strictly spherical. This is because, like an amateur, I broke my circle cutter part-way through. New blades, please!

Though very simple, I’ve no doubt this will be on the dresser for a few months to come. I like the fact that the present and card theme marry up, and it’s something a little different.

I popped this in one of my upcycled envelopes. What do you think?