Paperchase Christmas in July Showcase

Now, I know that Christmas is still a little way off (OK… a long way off), but as you may know, many of our favourite bigger brands / retailers (like Paperchase) like to reveal their Christmas showcase to media slap bang in the middle of summer, so that we get an early peak at the upcoming festive trends.

When I stepped into the Paperchase ‘Christmas in July’ event last week (at the appropriately named ‘ICETANK’), I found myself genuinely wishing for snow to relief us of the heatwave in London! As I was the first person through the door (I think you call it a ‘keen bean’), I was fortunate to be taken round by Paperchase’s very own Marketing Manager for a whistle-stop tour of the Christmas range.

Paperchase_Xmas in July_Shelley Makes-084317

At the entrance we were urged to ‘unlock our creative spirit this Christmas’, and inside we were presented with a myriad of gift and craft ideas. Highlights for me were the DIY cracker chandelier, which would look great suspended over a dinner table, as well as the mega suspended card wreath (though I would need to make a lot more friends to fill it), both of which you could recreate at home.

Continue reading

Etsy Made Local Christmas Markets 2017

A few weeks back I received an exciting mystery package from the Etsy Made Local London Team. To celebrate their upcoming Christmas market in South London, the team sent me a box of specially curated goodies from selected Etsy sellers who’ll be showcasing their handmade wares in December.

Etsy Made Local Xmas 2017-7468 Shelley Makes

I went to my first Etsy Made Local Xmas market in 2015, and I loved it. I went looking for Christmas presents for friends and family but went home with lots of lovely goodies for me! Back then I bought a set of tiny concrete diamond ‘baubles’ from PASiNGA, whose stall I loved, and they come out every year.

Etsy Made Local Xmas 2017- Pasinga Shelley Makes.jpg

I was so excited to receive my package – the team told me that they’d tailored the contents to suit my style and audience, and I don’t think I could have picked better for myself if I tried. The first item I saw was this gorgeous hand-formed blue and white mini rope bowl by Zuzana of Rope Works. The bowls are naturally dyed with Indigo and make perfect trinket bowls for jewellery by your bedside.

Etsy Made Local Xmas 2017-7561 Shelley Makes

Next up I spotted a brown leather key chain from Suede & Co who make handmade leather and suede accessories from coin purses to laptop sleeves. My second leather goody came in the form of a leather cord holder / cable organiser from By Law London. These are perfect for keeping your headphones together in your bag. Janet sells sets of two for £9, alongside other leather accessories.

Continue reading

Christmas Gift Wrapping with IKEA

A few months back I was invited to a festive gift-wrapping workshop with IKEA in London. It was far too early to really think about Christmas back then (I think it was June!), but the event also offered a sneak peak at IKEA’s Autumn / Winter collection (in-store now), which I couldn’t refuse!

You might remember that last year IKEA put on a Christmas tablescaping workshop for a few crafty bloggers, where I obsessed over a gorgeous black bear ornament. This time we were treated to a gift-wrapping workshop with the lovely Janine, who has a completely different creative job by day, but is a widely acknowledged ‘awesome gift wrapper’ on the side – nice to be multi-talented!

IKEA Autumn Winter DIY-203927

It was lovely to see some friendly faces in the form of Gabrielle from Design Curator and Anna from The Smell of Roses (not to be confused with The Only Smell is Roses, which I nearly wrote – too much TOWIE), and to meet some new faces too – namely Lou from Little Green Shed, Jess from The Only Girl in the House and Georgia from Flowers in the Window. As well as making some gorgeous gift-wraps, Georgia also patiently put up with a mega coughing fit from me on the train back to Essex – sorry!

Continue reading

IKEA Christmas Tablescaping Workshop

Can you believe that it’s just six more Sundays until Christmas? I don’t know about you, but for me it feels like the months fly by quicker and quicker every year! Still, at least it’s nearly the holidays!

ikea-christmas-43

Earlier this year I was invited to an IKEA tablescaping event with some fellow bloggers to preview IKEA’s Autumn / Winter range, as well as take a sneak-peak at some of IKEA’s scandi-inspired Christmas goodies. I’m a big fan of IKEA, and always try and fit in a visit before Christmas.

The event was held at 19 Greek Street – a modern white event space in Central London. I was thrilled to join some blogger friends – namely Hannah from Crafternoon Cabaret Club, Tasha from Graphique Fantastique, Rosie and Hannah from The New Craft House, and Emma from Emma Jane Palin.

ikea-christmas-51

After an introduction from the IKEA bods who talked us through the four new autumn / winter trends, we were invited to have a leisurely peruse, and get hands-on with our own DIY tablescapes. A credit to the IKEA wares, we soon felt at home, and were all prepared to move in within minutes.

Continue reading

Silhouette Cut-Out Snowflake Cards

In the words of Adele, ‘Hello!’ – I hope you all had a fantastic Christmas! I am finally home after doing the family rounds, and thinking about all of the heartfelt ‘Thanks’ that I need to send.

IMG_1697 USE

I’ve always done ‘Thank You’ cards for as long as I can remember, and where possible, I prefer to make them by hand. I actually started these cards last year, but finished them off this year.

Last Christmas my lovely other half got me a Silhouette Portrait machine – a bit like a Cricut – that cuts out shapes or letters to your design. As this was my first foray into using the cutter, I kept it simple, opting to use the free snowflake template that came with the Silhouette library, like so.

Xmas Thank You USE

I added lines around it so that the cutter would make three cards per sheet of A4, and experimented with using a dashed cut for the fold. As it’s Christmas, I tried cutting on two different card stocks – a shiny silver metallic card, and also thick white card, like a proper snowflake!

IMG_1935 USE

Once the machine has finished cutting the pattern, you have to carefully peel the card off of the sticky mat, and pick out the diamonds using your nails or a sharp implement. If you don’t have a cutter, you can also create this card using a sharp scalpel – it might take a little longer, but it’s do-able!

To make the pattern stand out I stuck a blue coloured square to the inside of the silver cards. On the white cards, I stuck coloured card on both sides, and added a white wool bow in the middle.

IMG_1805

The best thing about these festive cards is that in daylight (or even lamp-light) they cast really nice shadows and reflections in the room, like sun-catchers, so they really catch your eye!

Are you making ‘Thank You’ cards this year? Thanks also to you guys for following the blog this year – I hope you have a very Happy New Year and 2016! I’m off to party prep for NYE now…!

Simple Festive Gift Wrap Inspiration

Ready or not, Christmas is ‘a coming, and I’m just about getting excited now, in that panic-stricken ‘haven’t-bought-any-presents‘ kind of a way. But what better way to procrastinate from buying presents, than by exploring gorgeous gift wrap options for said (eventual…) presents!

festivegiftwrapinspiration

These nine gift-wrap ideas all caught my eye for their simplicity. I love a bit of natural foliage, and brown paper always manages to look great. My faves are probably No. 2 – the DIY paper straws (so effective, and yet incredibly easy too), and also the wrapping pleats on No. 5.

For full DIYs, visit:

1. DIY Brush Lettered Gift Pouches, Shelley Makes | 2. DIY Paper Straw Gift Wrap Toppers, Fall For DIY | 3. Holiday Gift Tags, Almost Makes Perfect | 4. Pine Twig, Portland General Store | 5. Brown Paper Packages, Kate’s Creative Space | 6. Holiday Wrapping Paper, Go Forth | 7. Christmas Tree Gift Topper, Fellow Fellow | 8. Brown Paper Label Maker, Cherry Blossom | 9. Brown Gift Paper, Deas & Mia

Happy wrapping! Ho Ho Ho!

Contributing to the We Make Collective!

If you haven’t yet heard of it, the We Make Collective is founded by the incredibly talented Fran from Fall for DIY. After hearing far too many people ‘poo-poo’ their own creativity (my words, Fran’s ethos), Fran decided to create a monthly craft kit for subscribers, with a fantastic twist.

We Make Collective

Rather than sending out materials and instructions to help you make the same thing as everyone else, the Collective give you the tools, know-how and inspiration to exercise your own creativity, and make something unique to you – so you’re free to make whatever you want!

We Make Collective calligraphy kit

If you become a subscriber, each month you’ll receive a special box full of supplies which will give you everything you need to learn a new craft, and create any number of finished pieces. Each kit focusses on a different skill – November’s was weaving, and December’s was brush lettering & calligraphy.

As well as receiving the physical materials, you’ll be granted access to a private member’s area on the website where you can read expert tutorials, and learn all the skills you need to get started.

When I first heard about these kits, I thought they were such a great idea, and the finished DIYs from the inaugural weaving kit looked fantastic (check out #wemakecollective on Instagram). As a result, I was thrilled when Fran invited me to contribute a brush lettering tutorial for the December kit.

Joy orange gift pouch

I decided to make a trio of quick and easy brush-lettered gift-wrap ideas, suitable for beginners. You can read the full tutorial here with all my hints and tips, but I wanted to share a sneak-peak with you.

Brush lettering is really therapeutic once you get the hang of it, and the end result looked a million times better than my normal hand-writing. Result! Have you tried it before?

My biggest hint if you’re a brush-letter ‘newb’ is to write on tags or stickers in the beginning while you master the skill, as then, if you make a mistake, you can simply replace the tag – easy!

The other secret is simply to practice – practice, practice, practice, and enjoy =)

“For your Mistle-toes” Christmas gifts

Last Christmas I came across this great DIY gift – a pedicure kit with a seasonal play on words – ‘For your mistle toes!’ I thought it would be great to give to friends, so I set about designing my own.

DIY Mistle-toe gifts | Shelley Makes

You will need:

  • Pedicure kit e.g. nail varnish / mini foot cream / nail file
  • Small cellophane bags
  • Gold or silver metallic card
  • Printer
  • Rota-trim or scissors
  • Stapler

Instructions: 

I designed my labels in InkScape, using free fonts from DaFont.com, and ended up with two different designs. On one side it read ‘For your mistle toes’, and on the other ‘To Natalia’, or whoever.

The main thing to remember if you design your own is to flip the font on one half so it’s upside down. You also need to check that the printed result is the same width as your cellophane bag.

Once designed, I printed my bag toppers onto silver and gold metallic card (I had to feed this into my printer rather than leave it in the tray, as it’s quite a bit thicker than normal card stock).

Becky Mistle-toes | Shelley Makes

Once printed, I cut out each gift topper using a rota-trim, and then used the rota-trim again with a perforated blade to help me fold the tags in half, but you could just fold carefully as normal.

Continue reading

Homemade Jam & Chipotle Jar Labels

Tis the season to start crafting! Are you making any homemade gifts this year? I’ve finally got round to posting about some DIY homemade jams and preserves that we made for family last year.

Homemade Jam | Shelley Makes

The other half took the lead on the jam-making, while I went to work on the labels. I have to say, the labels make such a difference, making this DIY look way more professional than it actually is!

Making jam (instructions courtesy of Jack):

To make the jam, use 50% fruit, 50% sugar, a splash of lemon juice (as the pectin in it helps the jam to set), and a small knob of butter. In terms of equipment, you will need:

Homemade Jam | Shelley Makes

  • Saucepan
  • Cooking thermometer
  • Set of glass preserve jars (my hexagonal jars are from Hobbycraft)
  • Reduced fruit (whatever you fancy / is on offer)

Stew the fruit in a saucepan before adding the sugar, and then slowly, using a thermometer, bring the temperature up to 80°C to a slow simmer, stirring continuously.

Homemade Jam | Shelley Makes

Once all the sugar has dissolved, slowly increase the temperature to 104°C (for approximately 5 minutes). Allow the jam to cool and then pour the liquid into sterilised jars.

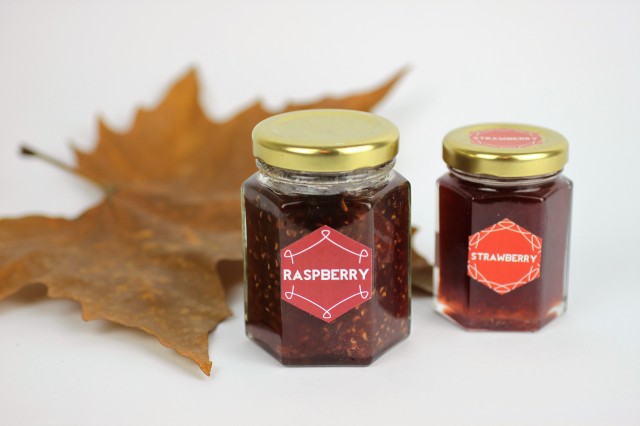
After a couple of hours (or once cool) the jam will set, and is ready to enjoy! You can pick any fruit you like – we made raspberry, apricot, and plum jam, plus some homemade chipotle.

Homemade Jam | Shelley Makes

Making the labels:

I used InkScape to make the labels, and decided on a hexagonal design to match the shape of the jars. I used the font Revolution from DaFont.com, as it was the most legible despite the small size.

We also made Jelly Shack barcode labels (using a free font called bar code from DaFont.com) for the back of the jars as an alternative to a ‘Made by’ sticker (as our names are Shelley and Jack, Jelly Shack has become our co-brand – cheesy I know, but it was just a bit of fun!)

Homemade Chipotle | Shelley Makes

I arranged the labels on the sheet so that I could cut them out easily using a rota-trim, but for added ease, you could use a Silhouette machine (I didn’t get one until after Christmas – doh!)

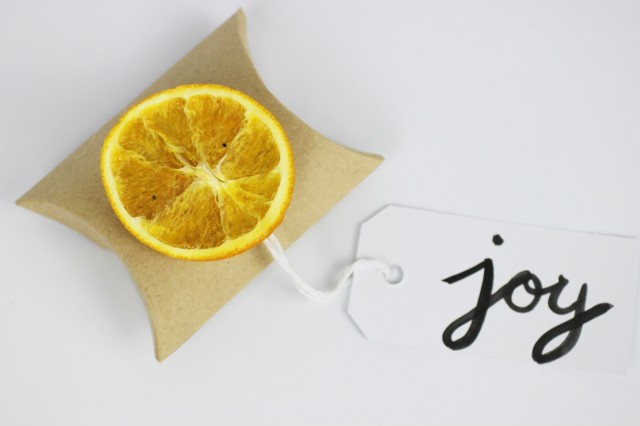
Once cut out, it’s simply a case of sticking your labels in position, and voila! I wrapped each of the sets up in orange tissue and cellophane, with a festive illustration and name tag on the front.

Though inexpensive, these treats went down way better than any present I’ve ever bought!

Inspiration: DIY Christmas Advent Calendar

Last year I shared my Christmas advent calendar inspiration, but this year I felt I needed all new ideas. As you can see, this time I appear to be favouring the minimalist approach:

Five DIY Christmas Advent Calendars

Are you counting down ’til Christmas? What does your advent calendar look like this year?

For DIY tutorials, visit:

1) Unknown, Minimalist Advent Calendar | 2) Tell, Love and Party, DIY Christmas Tree Advent Calendar | 3) La Maison de Lou Lou, Tree Box Advent Calendar | 4) Hither & Thither, Hanging Bag Advent Calendar | 5) Third Floor Design Studio, Paper Bag Advent Calendar