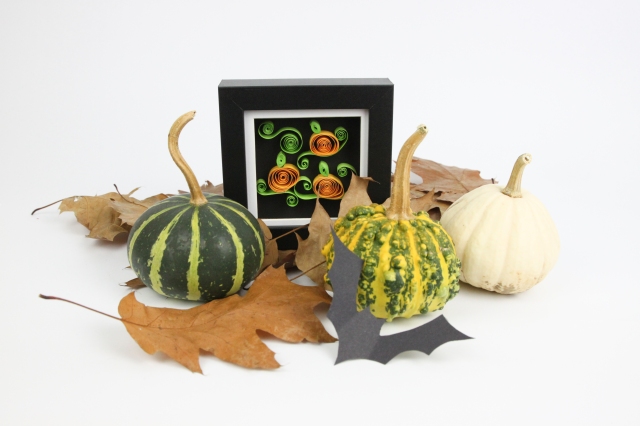
Over the summer I shared my first sponsored Bostik blog tutorial showing how to make a DIY Bug Hotel. Well, my next Bostik blog is a little crafty something for Autumn, featuring cute paper quilled pumpkins and Bostik Micro Dots – perfect for Halloween decorations, and suitable for beginners!

Before this project I had never quilled before, but after finding lots of inspiration and a few tutorial videos online (showing how to create basic shapes), I decided to give it a go. I found all of the necessary supplies at Hobbycraft, and was kindly gifted my micro glue dots by Bostik.
For this DIY, you will need the following:
- Bostik Micro-Dots
- Quilling pen / needle
- Assorted quilling paper strips (10mm)
- Shadow Box Frame (10cm x 10cm) – currently half price in Hobbycraft
- Quilling template board (optional)

Instructions:
The quilling pen / needle is a really simple tool to use. You simply put the end of your strip of quilling paper through the slot, and then, using your thumb to guide the paper, turn the pen in your other hand so that the paper rolls round the end into a tight coil. The tighter you wind, the tighter your coil will be.


Once the paper is fully wound, carefully remove it from the end of your quilling pen and set it down on the side so that it can ‘relax and unwind’. I bought a quilling template board to help me get to grips with how to turn the coils into different shapes. If you’re aiming for uniform shapes and sizes I’d definitely recommend getting one. It can help you create circles, ovals, hearts, tear drops, squares, triangles…


Once your circle is the size you want glue the end down to secure it. You can then begin pinching and coercing it into the shape you want. I went for simple oval orange pumpkins, and then made some vines using shorter lengths of green quilling paper, rotating the ends in different directions to create opposite flicks. For the stalks, I made tight green coils, and then squidged them into an ‘eye’ shape.
I wanted my picture to have a black background so I cut a square to size to act as my backdrop. Before I started gluing anything in place, I had a play around with where I wanted each pumpkin to sit, so I could be sure I was happy with their positions. Once you’ve got a design in mind, the sticking can commence.

Micro Dots are great for sticking small, delicate or irregular shapes, ribbon, or embellishments as there’s no drying time required. The tiny dots act like a sticker transfer so you simply stick your object onto the sheet, rub down, and lift off – the glue dots will have transferred to your object, making it ready to stick.


As the paper quills are very thin, I thought the micro glue dots would be great for making each tiny surface sticky whilst remaining hidden / see-through from the front. It also means you won’t get wet glue on your fingers – just be careful you don’t put anything down on the transparent sheet if it’s facing up!

Once your shapes are glued in place it’s time to pop it into your frame, and voila! You’re ready for Halloween. The shapes I’ve used here are really simple to make, but if you fancy doing something more adventurous then there are loads of printable templates available online. Do check out Pinterest.

You can go as big and bold as you like. I’d love to see what you come up with!
Disclosure: This post is sponsored by Bostik as part of the HIBS100 #BostikBlogger series. I was sent a box of Bostik glue goodies to create this post. I hope you like this DIY series.


